| Excerpt | ||
|---|---|---|
| ||
How to edit the Confluence dashboard. |
For such an important page, Confluence's dashboard (home page) sure is hard to alter. Say we want to display some wiki-rendered content on the left-hand side. In my case, I want to display the Atlassian Product Releases Macro on the dashboard:
...
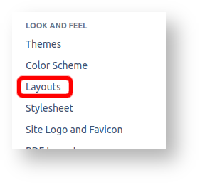
- Go to Administration -> Look and Feel -> Layouts (or type 'gg layouts' for a shortcut)
- On the Global Layout line, click 'Create custom'
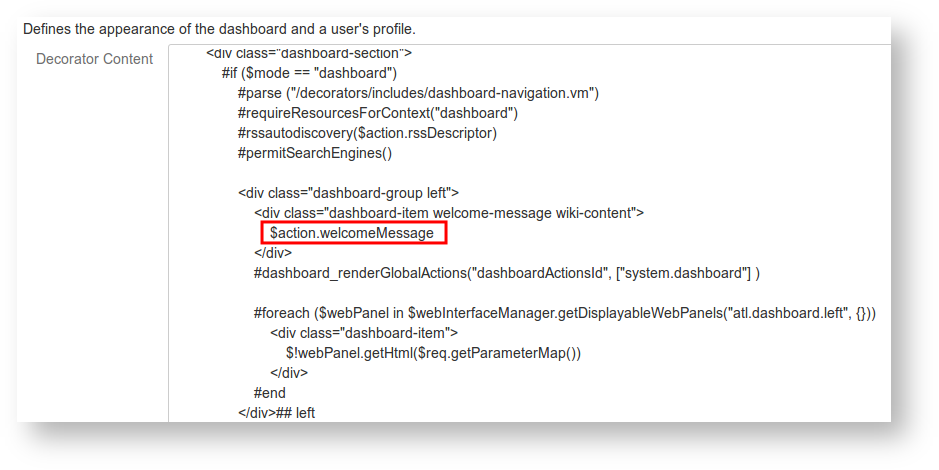
- Search for the div containing the welcome message:
Below the div, insert the Velocity markup:
Code Block ## Dashboard customization $helper.renderConfluenceMacro("{include:TECH:_dashboard|nopanel=true}")where TECH is the name of the space your content resides in.
Use surrounding whitespace and indentation to make it visually distinguishable: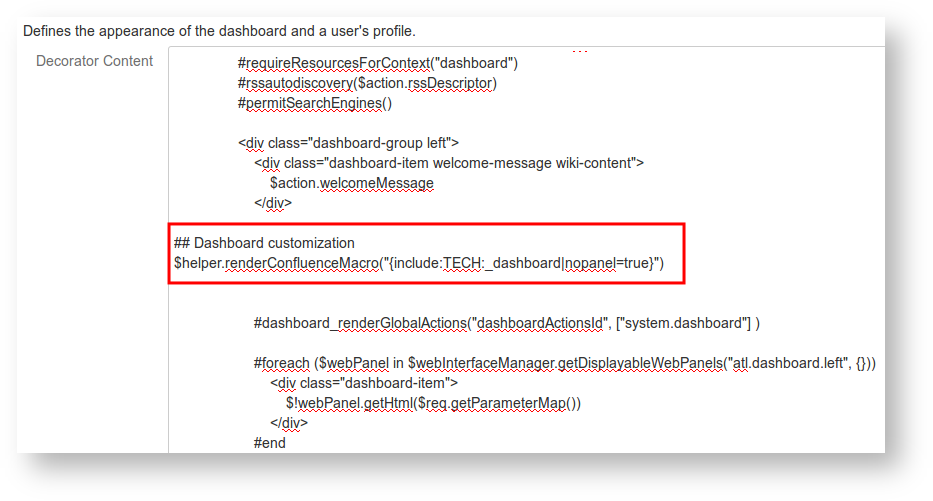
...
Keep in mind that Atlassian could update the default dashboard decorator between versions, and if you have customized it, as above, your Confluence may not render correctly. One would hope that Atlassian would mention such a backwards-incompatible changes in the release notes.
Addendum
If you have customized your global layout in the past, and then upgraded Confluence (I'm on 7.1.2) you may find the right panel just displays:
| Code Block |
|---|
Error formatting macro: recently-updated-dashboard: java.lang.NullPointerException |
I find that just resetting and re-creating the custom Global Layout fixes this:
- As before, go to Administration -> Look and Feel -> Layouts (or type 'gg layouts' for a shortcut)
- On the Global Layout line, click 'Edit'
- Copy the custom content into your local clipboard
- 'Cancel' to return to the Edit Site Layouts page
- On the Global Layout line, click Reset Default
- On the Global Layout line, click Create custom
- Paste your saved custom content.
- 'Save'