If you are writing a script that interacts with Jira through a REST API, you should authenticate using an OAuth token, rather than an embedded username/password. Here we describe one way to do the 'oauth dance' to generate a trusted token using Python 3 - specifically the jirashell utility from the jira Python package. jirashell then forms a useful basis for a Python script.There are many attempts to explain this process on the internet. Every one I have found has been awful: either hand-waving away details, or too dense, trying to explain the mechanics of OAuth with missionary zeal. This guide is admittedly also awful (partly due to jirashell bugs), but if you follow the steps carefully it should work without much thinking.
On with the instructions.
Establishing OAuth trust
Install Python 3
Running python3 or python --version should show Python 3.x.
Create a venv
mkdir jira-oauth
cd jira-oauth
python3 -m venv venv
. venv/bin/activate
Install Python libraries
pip3 install jira ipython
Generate an RSA public key
openssl genrsa -out rsa.pem 2048
openssl rsa -in rsa.pem -pubout -out rsa.pub
Create an application link
In Jira (or Confluence), create an applink. Applinks normally connect to other HTTP apps, but in this case our OAuth client doesn't have a URL, so use a fake one.
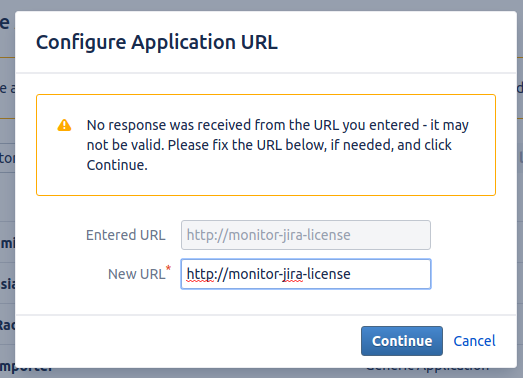
I originally created these instructions when creating an OAuth token for a Nagios Jira license monitor, hence the token I use is monitor-jira-license , and the fake URL is http://monitor-jira-license:

Jira will complain, but just click Continue:
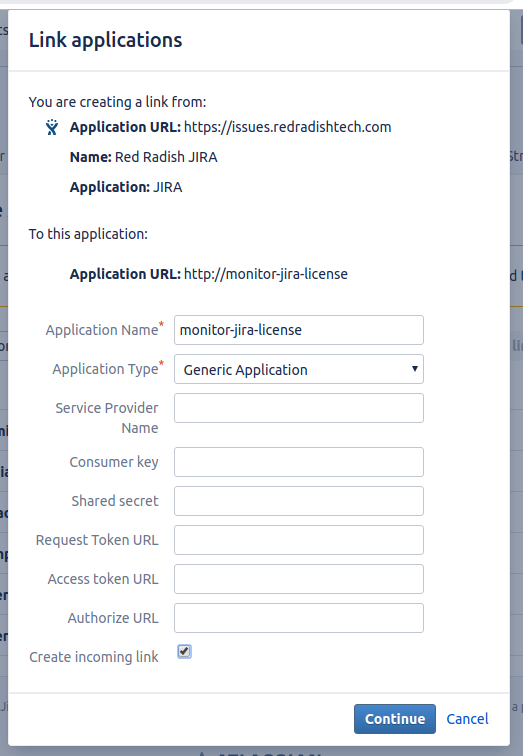
On the next page, enter 'monitor-jira-license' as the Application Name. Leave other fields blank. Check the 'Create incoming link' checkbox:
On the next page, fill in:
| Field | Value | Notes |
|---|---|---|
| Consumer Key | monitor-jira-license | this key will be used in the script |
| Consumer Name | Monitor Jira License | any descriptive text |
| Public key | contents of rsa.pub |
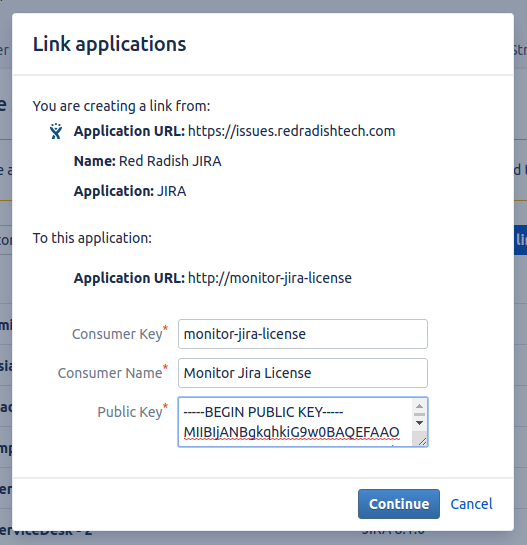
Click 'Continue', and your application link will be created.
![]()
OAuth dance
Now from your terminal, do the OAuth dance with your Jira installation:
BROWSER='echo %s' jirashell --server https://issues.redradishtech.com --consumer-key monitor-jira-license --key-cert rsa.pem --oauth-dance
This should print a URL. Open it in your browser:
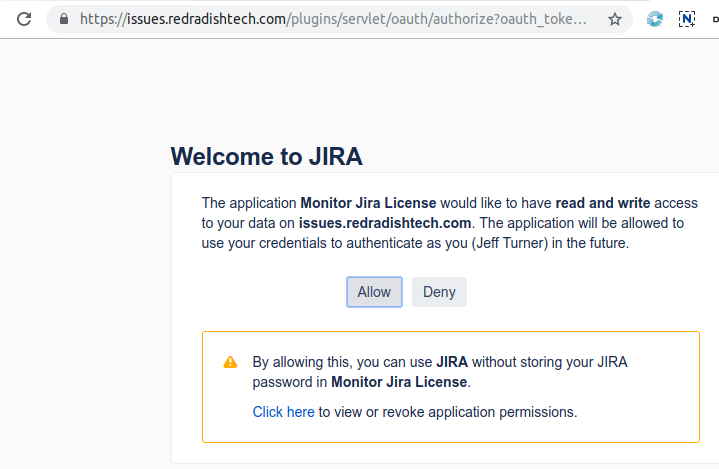
Click *Allow* in the Browser window:

After the URL, your terminal also should have displayed:
Your browser is opening the OAuth authorization for this client session.
Have you authorized this program to connect on your behalf to https://issues.redradishtech.com? (y/n)
Press 'y'.
The jirashell command now proceeds to launch an IPython session:
<JIRA Shell 2.0.0 (https://issues.redradishtech.com)>

*** JIRA shell active; client is in 'jira'. Press Ctrl-D to exit.

In [1]:
Type oauth to print the OAuth object:
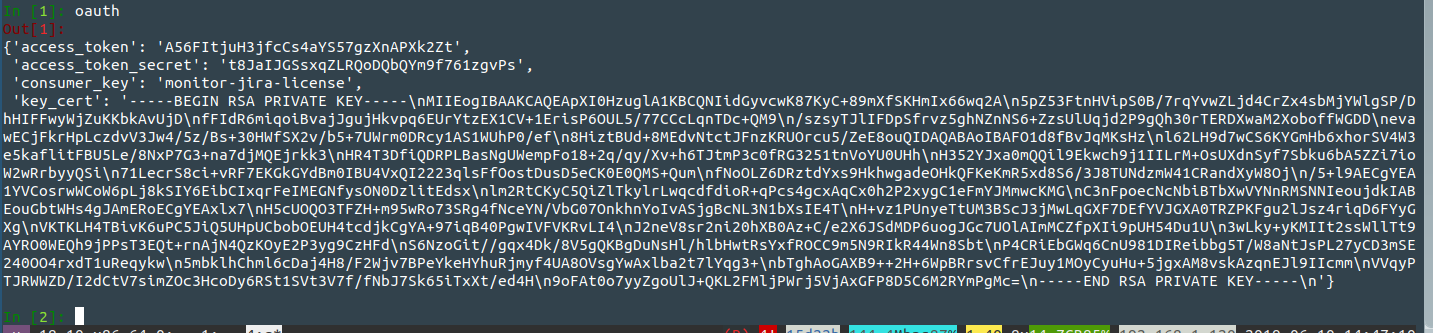
Now press ctrl-d to exit.
Test your OAuth token
Now embed the 'Request token' and 'Request token secret' values you saw above into a new jirashell command:
jirashell --server https://issues.redradishtech.com --consumer-key monitor-jira-license --access-token A56FItjuH3jfcCs4aYS57gzXnAPXk2Zt --access-token-secret t8JaIJGSsxqZLRQoDQbQYm9f761zgvPs --key-cert rsa.pem <<< 'jira.server_info()'
If successful, the jira.server_info() command piped to stdin should succeed:
<JIRA Shell 2.0.0 (https://issues.redradishtech.com)>

*** JIRA shell active; client is in 'jira'. Press Ctrl-D to exit.

In [1]: Out[1]:
{'baseUrl': 'https://issues.redradishtech.com',
 'version': '7.13.0',
 'versionNumbers': [7, 13, 0],
 'deploymentType': 'Server',
 'buildNumber': 713000,
 'buildDate': '2018-11-28T00:00:00.000+1100',
 'scmInfo': 'fbf406879436de2f3fb1cfa09c7fa556fb79615a',
 'serverTitle': 'Red Radish JIRA'}

In [2]: Do you really want to exit ([y]/n)?
You now have the three things you need for your script: the token, the token secret, and rsa.pub private key.
Using jirashell as a base for your script
If your script is Python, you can use jirashell as a library to handle all the ugly command-line parsing. In my case:
$ cp venv/bin/jirashell check-jira-license
$ vim check-jira-license   # Make changes
$ cat check-jira-license
#!/home/jturner/src/redradish/nagios-jira-license/venv/bin/python3

# -*- coding: utf-8 -*-
import re
import sys

from jira.jirashell import get_config, JIRA

def main():
    options, basic_auth, oauth = get_config()

    jira = JIRA(options=options, oauth=oauth)

    print(jira.server_info())

if __name__ == '__main__':
    sys.exit(main())
This command can then be invoked using the same command-line flags as jirashell :
./check-jira-license --server https://issues.redradishtech.com --consumer-key monitor-jira-license --access-token kLYKeT0g9EiJDDmqlxQTH9VjRs2fpFS6 --access-token-secret snhWUlGQmzLu6I9ju1aQGNjulQQPT1lz --key-cert rsa.pem
Some JIRA REST calls are not wrapped in the Python JIRA library. For those, you can use the OAuth credentials with the requests library directly, as follows:
#!/home/jturner/src/redradish/nagios-jira-license/venv/bin/python3

# -*- coding: utf-8 -*-
import re
import sys

from jira.jirashell import get_config, JIRA
import requests

def getlicensecounts(options, jira):
    url=options['server'] + '/rest/plugins/applications/1.0/installed/jira-software'
    response = requests.get(url,  auth=jira._session.auth)
    responsejson = response.json()
    return (responsejson['accessDetails']['activeUserCount'], responsejson['accessDetails']['licensedUserCount'])

def main():
    options, basic_auth, oauth = get_config()

    jira = JIRA(options=options, oauth=oauth)
    activecount, totalcount = getlicensecounts(options, jira)
    print(f"Using {activecount} of {totalcount} license slots")

if __name__ == '__main__':
    sys.exit(main())
You can invoke non-REST ( /secure/admin/* ) URLs with OAuth credentials too, but Jira's "websudo" authentication will demand a password, rendering OAuth useless.